The art of pencil shading involves tons of techniques that would enhance our drawings to lifelike sketches and they appear to be very realistic and alive. It involves a number of different techniques, methods that we have explained all here. You can always learn to draw lifelike body parts. Well, in this post we have covered different aspects of shading techniques with examples.
#1 Gradated Tonal Shading
Gradated tonal shading involves smoothly transitioning from light to dark values. It’s essential for achieving realistic depth and volume.
a) Application
- Begin with a light touch, gradually increasing pressure as you move from the lightest area to the shadow
- Use a soft pencil (e.g., 2B or 4B) for seamless transitions
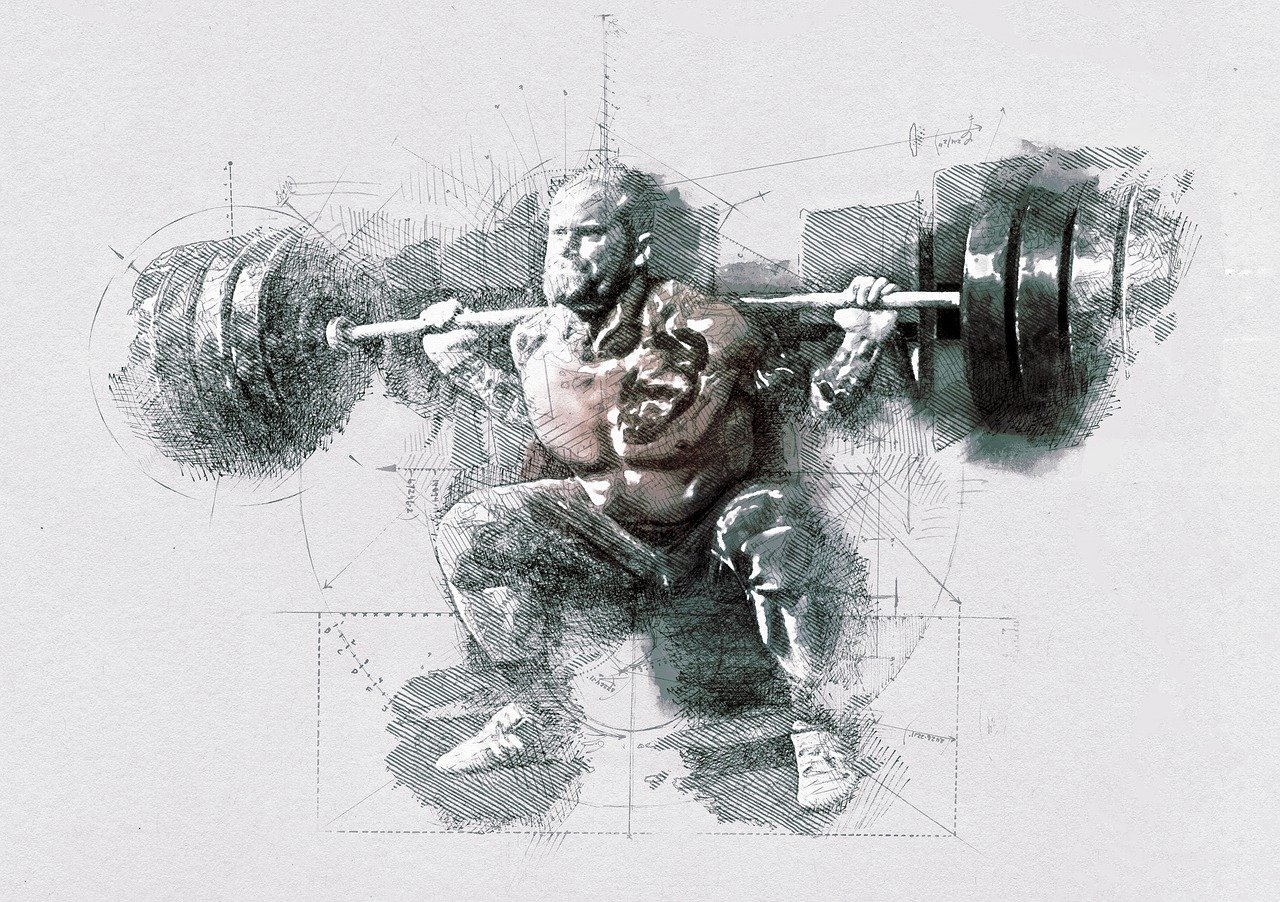
- Metal Surface: Imagine a polished silver teapot. The gradual shading captures its reflective quality, emphasizing highlights and shadows
#2 Layering and Burnishing
Layering involves building up tones by overlaying multiple pencil strokes. Burnishing, on the other hand, uses a colorless blender or a harder pencil to smooth and intensify the layers.
a) Application
- Layer different pencil grades (e.g., 2H, HB, 2B) to create depth
- Burnish with a blending tool or a white pencil to achieve a polished, almost glossy effect
- Example – Skin Texture: Layer light skin tones (2H or HB) over shadows (2B or 4B). Burnish gently to mimic the softness of skin
#3 Cross-Contour Shading
Cross-contour shading follows the contours of the subject, emphasizing its form and three-dimensionality.
a) Application
- Observe the direction of curves and lines on the object’s surface
- Shade parallel to these contours, creating a sense of volume
- Example – Fur: For a furry animal, like a wolf, cross-contour shading accentuates the flow of individual hairs.
#4 Stippling and Hatching Combo
Combining stippling (dots) and hatching (lines) adds intricate texture.
a) Application
- Use stippling for fine details (e.g., fabric patterns, rough skin)
- Hatching can define larger areas (e.g., folds in fabric, wood grain)
- Example- Fabric: Stipple to depict woven fabric, then use hatching to indicate folds and shadows.
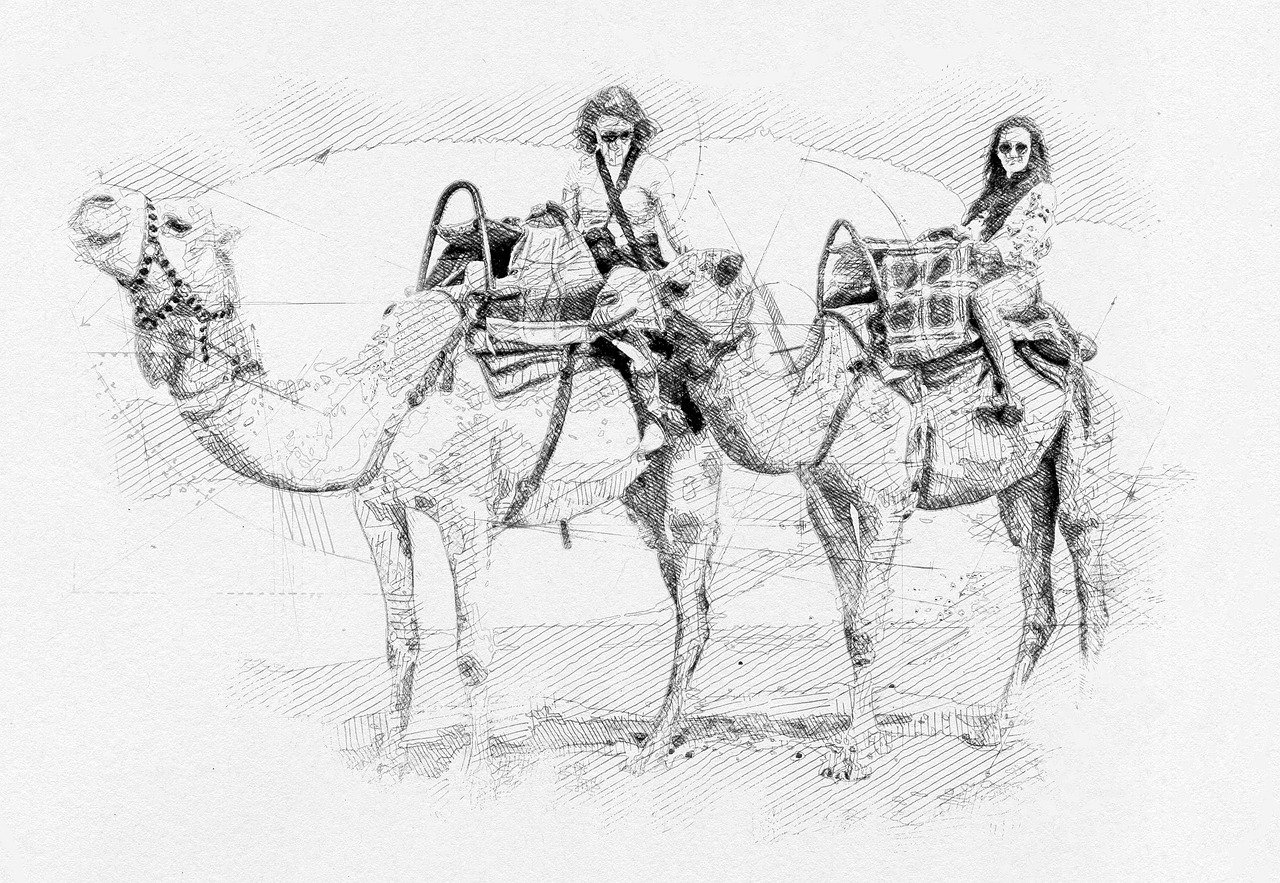
#5 Hatching and Cross-Hatching
a) Hatching
Hatching involves creating parallel lines or strokes in the same direction to establish areas of light and shadow.
b) Techniques
- Line Variation – Artists adjust the length, angle, thickness, and spacing of the lines
- Direction and Movement – The direction of hatching lines can convey movement or emphasize specific features
- Ideal Mediums – Hatching works well with mediums like pen, ink, silverpoint, and etching
- Purpose – It provides a straightforward way to depict form and value
c) Cross-Hatching
Cross-hatching builds upon hatching by layering intersecting lines.
d) Technique
- Multiple Layers: Overlapping parallel lines create darker areas
- Depth and Texture: Cross-hatching adds depth and texture to drawings
- Controlled Variation: Artists adjust the angle and density of the lines for different effects
- Ideal Mediums: Similar to hatching, cross-hatching is effective with pen, ink, and other linear mediums
- Purpose: It enhances shading, especially in areas where hatching alone may not achieve the desired richness.
The Hatching relies on parallel lines, cross-hatching introduces additional layers and intersecting lines to create more complex tonal variations. Both techniques contribute to the overall visual impact of an artwork.
#6 Tonal Shading Details
Tonal shading involves skillfully altering the pressure applied to the pencil to achieve shadows and highlights. This technique is intuitive and often the first one artists learn. Here’s how it works:
- Creating Shadows and Highlights – By varying the pressure, artists can block in large areas with consistent values. Apply more pressure for darker marks (shadows) and reduce pressure for lighter midtones. For highlights, let the white of the paper show through
- Smooth Appearance – Tonal shading is ideal for achieving a smooth, realistic look. It works well with mediums like charcoal and graphite due to their soft leads
- Powdered Graphite or Charcoal – Artists can also brush powdered graphite or charcoal onto the paper for even tones and smooth results.